

Eclipse Che 7をインストール、起動した際の手順です。
公式手順ではいくつか方法が載っていますが、今回はminikubeの上でchectlを使って起動しています。
前提
前提として、以下をインストールした後に作業しています。
- Kubernetes(Docker Desktop)
- minikube
- chectl
インストールの際の作業は以下に記載しています。

minikube起動
コマンド
minikube start
実行
$ minikube start
 😄  minikube v1.6.2 on Darwin 10.14.5
 ✨  Automatically selected the 'hyperkit' driver (alternates: [])
 💾  Downloading driver docker-machine-driver-hyperkit:
     > docker-machine-driver-hyperkit.sha256: 65 B / 65 B [---] 100.00% ? p/s 0s
     > docker-machine-driver-hyperkit: 10.81 MiB / 10.81 MiB  100.00% 437.56 KiB
 🔑  The 'hyperkit' driver requires elevated permissions. The following commands will be executed:
 $ sudo chown root:wheel /Users/masaki/.minikube/bin/docker-machine-driver-hyperkit $ sudo chmod u+s /Users/masaki/.minikube/bin/docker-machine-driver-hyperkit
 Password:
 💿  Downloading VM boot image …
     > minikube-v1.6.0.iso.sha256: 65 B / 65 B [--------------] 100.00% ? p/s 0s
     > minikube-v1.6.0.iso: 132.31 MiB / 150.93 MiB  87.67% 260.78 KiB p/s 12m3s
 💣  Failed to cache ISO: https://storage.googleapis.com/minikube/iso/minikube-v1.6.0.iso: read tcp 192.168.3.11:58901->172.217.175.112:443: read: connection reset by peer
 😿  minikube is exiting due to an error. If the above message is not useful, open an issue:
 👉  https://github.com/kubernetes/minikube/issues/new/choose
$
失敗。
コマンド(修正版)
今度は起動オプションをつけて起動。
minikube start --memory=4096
実行
$ minikube start --memory=4096
 😄  minikube v1.6.2 on Darwin 10.14.5
 ✨  Selecting 'hyperkit' driver from existing profile (alternates: [])
 💡  Tip: Use 'minikube start -p ' to create a new cluster, or 'minikube delete' to delete this one.
 🔄  Starting existing hyperkit VM for "minikube" …
 ⌛  Waiting for the host to be provisioned …
 🐳  Preparing Kubernetes v1.17.0 on Docker '19.03.5' …
 💾  Downloading kubeadm v1.17.0
 💾  Downloading kubelet v1.17.0
 🚀  Launching Kubernetes …
 🏄  Done! kubectl is now configured to use "minikube"
$
今度は成功。
Eclipse Che起動
コマンド
chectl server:start --platform minikube
実行
$ chectl server:start --platform minikube
✔ Verify Kubernetes API…OK
✔ 👀 Looking for an already existing Che instance
✔ Verify if Che is deployed into namespace "che"…it is not
✔ ✈️ Minikube preflight checklist
✔ Verify if kubectl is installed
✔ Verify if minikube is installed
✔ Verify if minikube is running
↓ Start minikube [skipped]
→ Minikube is already running.
✔ Verify if minikube ingress addon is enabled
✔ Enable minikube ingress addon
✔ Retrieving minikube IP and domain for ingress URLs…192.168.64.2.nip.io.
✔ Start following logs
✔ Start following Che logs…done
✔ Start following Postgres logs…done
✔ Start following Keycloak logs…done
✔ Start following Plugin registry logs…done
✔ Start following Devfile registry logs…done
❯ 🏃 Running Helm to install Che
✔ Verify if helm is installed
✔ Check Helm Version: Found v3.0.2+g19e47ee
✔ Create Namespace (che)…done.
✔ Check Cluster Role Binding…does not exists.
✔ Preparing Che Helm Chart…done.
✖ Updating Helm Chart dependencies
→ Timed out
Deploying Che Helm Chart
Eclipse Che logs will be available in '/var/folders/4c/s94z8v4d42j3dfmbfwxhc3w40000gn/T/chectl-logs/1579535512290'
Error: Command timed out after 120000 milliseconds: helm dependencies update --skip-refresh /Users/masaki/Library/Caches/chectl/templates/kubernetes/helm/che/
Timed out
at timeoutKill (~/.local/share/chectl/client/7.7.0/node_modules/execa/lib/kill.js:58:23)
at Timeout.setTimeout (~/.local/share/chectl/client/7.7.0/node_modules/execa/lib/kill.js:74:4)
$
失敗。
コマンド(修正版)
時間がかかりタイムアウトが発生したので、タイムアウト値をあげて実行。
chectl server:start --platform minikube --k8spodwaittimeout=500000
タイムアウト値は以下を参考に設定。
https://stackoverflow.com/questions/59068517/unable-to-bring-up-eclipse-che-on-kubernetes
https://github.com/che-incubator/chectl
実行
$ chectl server:start --platform minikube --k8spodwaittimeout=500000
   ✔ Verify Kubernetes API…OK
   ✔ 👀  Looking for an already existing Che instance
     ✔ Verify if Che is deployed into namespace "che"
       ✔ Found running che deployment
       ✔ Found running plugin registry deployment
       ✔ Found running devfile registry deployment
     ✔ Check Che server status…RUNNING (auth disabled)
   ✔ ✅  Post installation checklist
     ✔ Retrieving Che Server URL…http://che-che.192.168.64.2.nip.io
     ✔ Che status check
 Command server:start has completed successfully.
 Eclipse Che logs will be available in '/var/folders/4c/s94z8v4d42j3dfmbfwxhc3w40000gn/T/chectl-logs/1579615430693'
$
今度は成功。
Eclipse Che 7にアクセス
無事にEclipse Che 7が起動したので、アクセスしてみます。
URLは起動時に表示されたものです。先ほどのコマンドの場合、以下の部分になります。
✔ Retrieving Che Server URL…http://che-che.192.168.64.2.nip.io
ダッシュボード
URLにアクセスすると最初にダッシュボード画面が表示されます、以下の感じです。
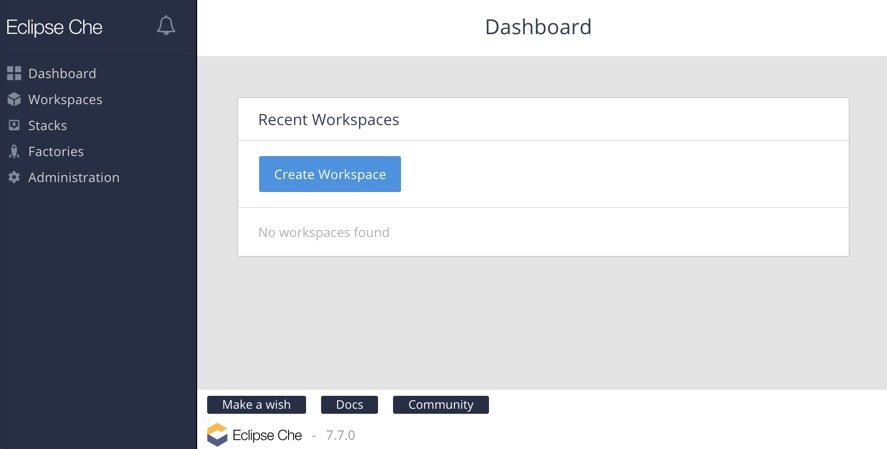
「Create Workspace」ボタンを押すとワークスペースの作成画面に移ります。
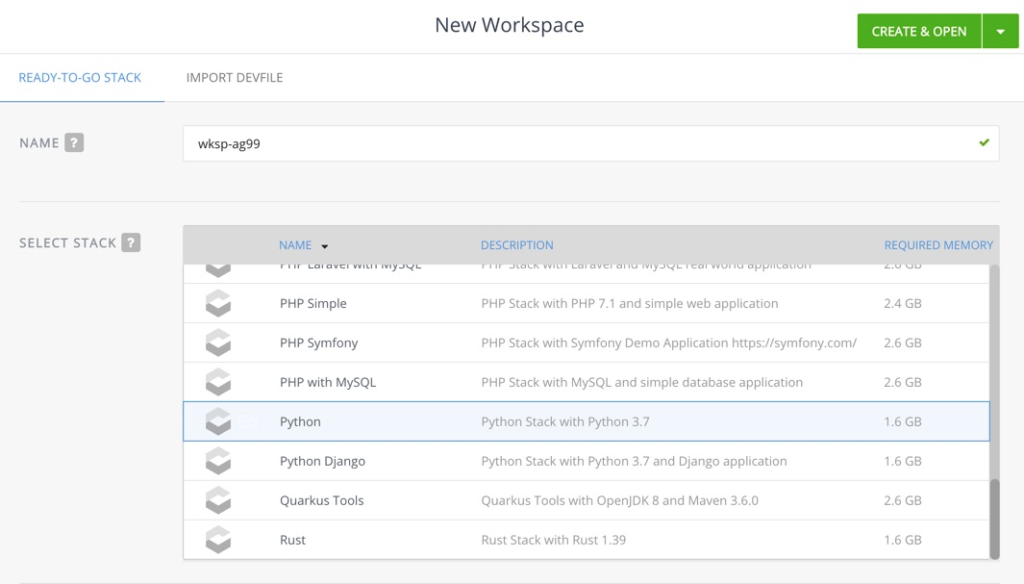
名前はデフォルトで入っているので、ここではそのままにしておきます。
さらに言語などの選択をします。上記の画面上ではPythonを選択しています。
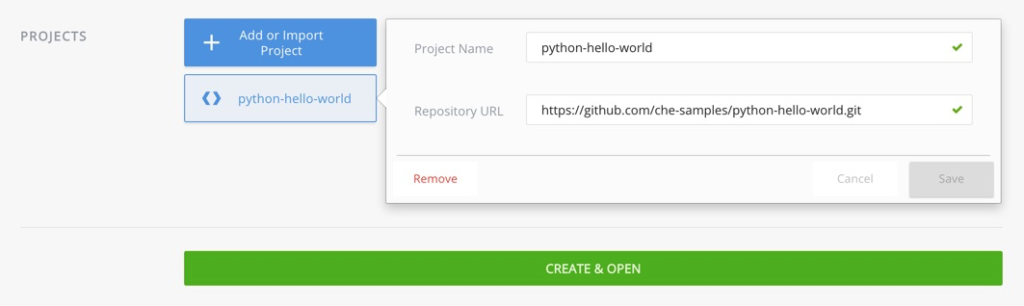
言語を選択するとサンプルのプロジェクトが選択された状態になります。
ここではサンプルを選択したままにしておきます。
最後に「CREATE & OPEN」を選択します。選択すると以下のような画面になります。
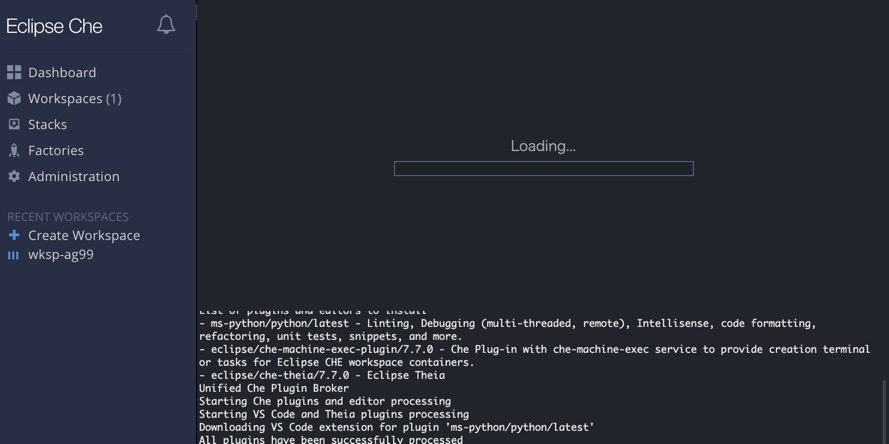
しばらく待つと起動します。
なお、私の場合ネットワーク環境が悪く何度もタイムアウトで失敗しました。
若干諦めていたのですが、朝のネットワーク的に軽い時間帯に試したところ成功しました。
今後について
無事に起動しワークスペースも作成できたので、次は使用感を確認していきたいところですが、私のローカル環境で試すには少々スペックやネットワーク状況が足りなさそうです。
公式サイトにはローカルへのインストール以外にも色々な方法が載っているので、今後はそちらを試して、そちらで使用感は確認してみたいと思います。
補足
途中、タイムアウトなどが発生しましたが、その際にログ的なものを確認した際のコマンドです。同様にうまくいかない方はこちらのコマンドを実行してみると良いと思います。
コマンド
kubectl get events --namespace che -o custom-columns=TIMESTAMP:lastTimestamp,TYPE:type,MESSAGE:message -w
コメント