

ここではEclipse CheでPHPUnitを実行する方法を記載します。
Eclipse Che上でPHPUnitが実行できることをゴールとしています。PHPUnit自体の説明はしていないので、多少のPHPUnitの知識がある方をターゲットにした記事です。
事前準備
作業の前に準備しておく内容を記載します。
リポジトリの用意
Eclipse Cheからアクセスできるリポジトリを用意しておいてください。
特に理由がなければGitHubのリポジトリで良いと思います。
また、リポジトリには以下のファイルを用意しておいてください。
ワークスペースの中で作成することもできるので必須ではないですが、ここでの手順はファイルが用意してある前提で記載しています。
サンプルをこのページの最後に載せているので、用意するのが面倒な方はそちらを参考にしてください。
PHPソース、テストコード
無事に設定ができたか確認するためにPHPのソースとテストコードを用意しておいてください。
conposer.json
「conposer.json」を用意しておいてください。
また、「require-dev」には「phpunit/phpunit」を記載しておいてください。
ワークスペースの作成
Eclipse Cheのワークスペースを作成しておいてください。
作成したワークスペースには先ほど用意したリポジトリを登録しておいてください。
ワークスペース作成までの流れは以下を参照してください。

コマンドライン実行
ここではEclipse Cheのコマンドライン上でPHPUnitを実行する手順を記載します。
なお、後述のコマンド登録を実施することで、ここでの手順は自動化することができるのでスキップしても大丈夫です。
ターミナル起動
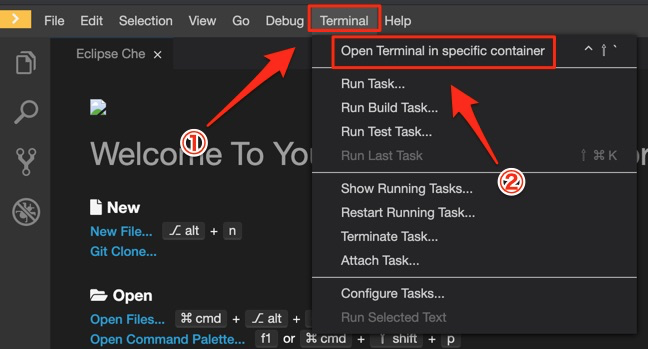
まずは画面の上部の「Terminal」を選択し、さらに「Open Terminal in specific container」を選択します。
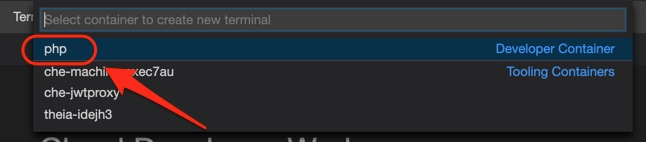
起動するターミナルの候補が表示されるので「php」を選択します。「php」の部分はプロジェクトの設定にもよるので、もし変更している場合は読み替えてください。
「php」を選択すると以下のようにターミナルが立ち上がります。
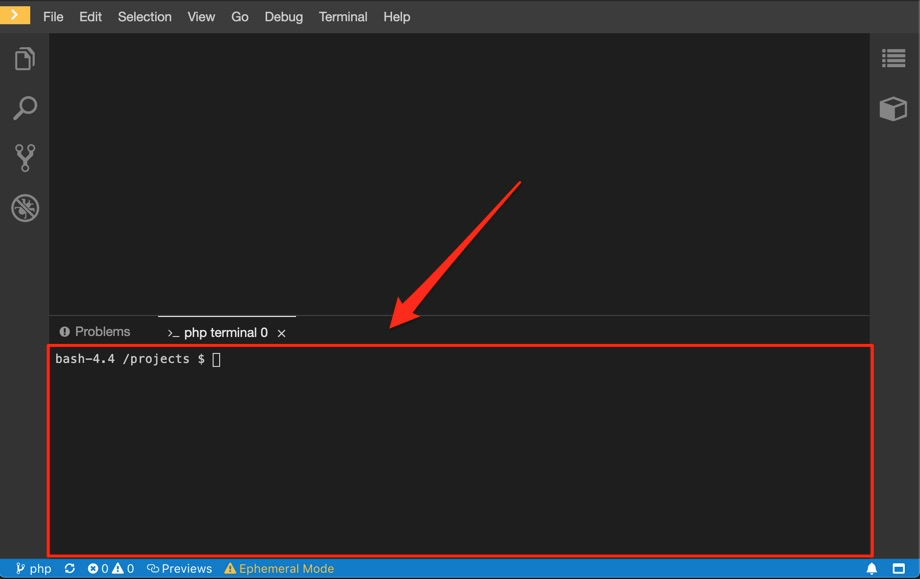
これで準備ができました。
PHPUnitインストール
起動したターミナルにて以下のコマンドを実行します。
コマンド
$ cd {プロジェクトのディレクトリ}
$ composer install
実行例
bash-4.4 /projects $ cd masaki-code-che/
bash-4.4 /projects/masaki-code-che $ composer install
Loading composer repositories with package information
Installing dependencies (including require-dev) from lock file
Package operations: 29 installs, 0 updates, 0 removals
  - Installing symfony/polyfill-ctype (v1.13.1): Downloading (100%)
  - Installing webmozart/assert (1.6.0): Downloading (100%)
  - Installing phpdocumentor/reflection-common (2.0.0): Downloading (100%)
  - Installing phpdocumentor/type-resolver (1.0.1): Downloading (100%)
  - Installing phpdocumentor/reflection-docblock (4.3.4): Downloading (100%)
  - Installing phpunit/php-token-stream (2.0.2): Downloading (100%)
  - Installing sebastian/version (2.0.1): Downloading (100%)
  - Installing sebastian/resource-operations (1.0.0): Downloading (100%)
  - Installing sebastian/recursion-context (3.0.0): Downloading (100%)
  - Installing sebastian/object-reflector (1.1.1): Downloading (100%)
  - Installing sebastian/object-enumerator (3.0.3): Downloading (100%)
  - Installing sebastian/global-state (2.0.0): Downloading (100%)
  - Installing sebastian/exporter (3.1.2): Downloading (100%)
  - Installing sebastian/environment (3.1.0): Downloading (100%)
  - Installing sebastian/diff (2.0.1): Downloading (100%)
  - Installing sebastian/comparator (2.1.3): Downloading (100%)
  - Installing phpunit/php-text-template (1.2.1): Downloading (100%)
  - Installing doctrine/instantiator (1.3.0): Downloading (100%)
  - Installing phpunit/phpunit-mock-objects (5.0.10): Downloading (100%)
  - Installing phpunit/php-timer (1.0.9): Downloading (100%)
  - Installing phpunit/php-file-iterator (1.4.5): Downloading (100%)
  - Installing theseer/tokenizer (1.1.3): Downloading (100%)
  - Installing sebastian/code-unit-reverse-lookup (1.0.1): Downloading (100%)
  - Installing phpunit/php-code-coverage (5.3.2): Downloading (100%)
  - Installing phpspec/prophecy (v1.10.2): Downloading (100%)
  - Installing phar-io/version (1.0.1): Downloading (100%)
  - Installing phar-io/manifest (1.0.1): Downloading (100%)
  - Installing myclabs/deep-copy (1.9.5): Downloading (100%)
  - Installing phpunit/phpunit (6.5.14): Downloading (100%)
sebastian/global-state suggests installing ext-uopz (*)
phpunit/phpunit-mock-objects suggests installing ext-soap (*)
phpunit/php-code-coverage suggests installing ext-xdebug (^2.5.5)
phpunit/phpunit suggests installing ext-xdebug (*)
phpunit/phpunit suggests installing phpunit/php-invoker (^1.1)
Package phpunit/phpunit-mock-objects is abandoned, you should avoid using it. No replacement was suggested.
Generating autoload files
bash-4.4 /projects/masaki-code-che $
実行後「vendor」ディレクトリが作成されていればOKです。
bash-4.4 /projects/masaki-code-che $ ls -d vendor/
vendor/
bash-4.4 /projects/masaki-code-che $
PHPUnit実行
インストールが無事にできたら、以下のコマンドを実行します。
コマンド
$ vendor/bin/phpunit {テストコードの配置ディレクトリ}実行例
bash-4.4 /projects/masaki-code-che $ vendor/bin/phpunit tests/
PHPUnit 6.5.14 by Sebastian Bergmann and contributors.

.                                                                   1 / 1 (100%)

Time: 28 ms, Memory: 4.00MB

OK (1 test, 1 assertion)
bash-4.4 /projects/masaki-code-che $
これでEclipse Cheのターミナル上で、PHPUnitを実行することができました。
自動実行(コマンド登録)
ここではEclipse Cheのタスク(コマンド)にphpunitのコマンドを登録し、実行する手順を記載します。
コマンド登録
コマンドの登録はダッシュボードの方で実施します。
ワークスペースの詳細を開き、Devfileタブを表示してください。
YAML形式で設定ができるので、「commands」のところに以下を追加してください。
追加が終わったら「SAVE」か「APPLY」を押してください。
Devfileのサンプルを以下に載せているので、もし設定がうまくいかない場合はこちらを参考にしてください。
https://github.com/masaki-code/che/blob/php/Devfile
インストールコマンド
  - name: composer install
    actions:
      - workdir: '${CHE_PROJECTS_ROOT}/masaki-code-che'
        type: exec
        command: composer install
        component: php
PHPUnitコマンド
  - name: phpunit
    actions:
      - workdir: '${CHE_PROJECTS_ROOT}/masaki-code-che'
        type: exec
        command: vendor/bin/phpunit tests/
        component: php
コマンド実行
コマンド実行はワークスペースの方で実施します。
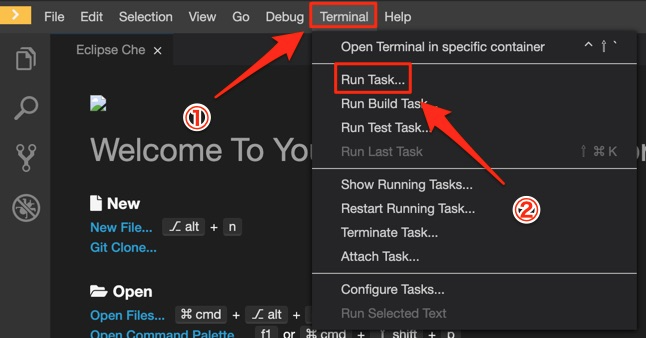
まずは画面の上部の「Terminal」を選択し、さらに「Run Task…」を選択します。
インストールコマンド実行
実行するコマンドの候補が表示されるので「composer install」を選択してください。

次に「Continue without scanning the task output」を選択してください。
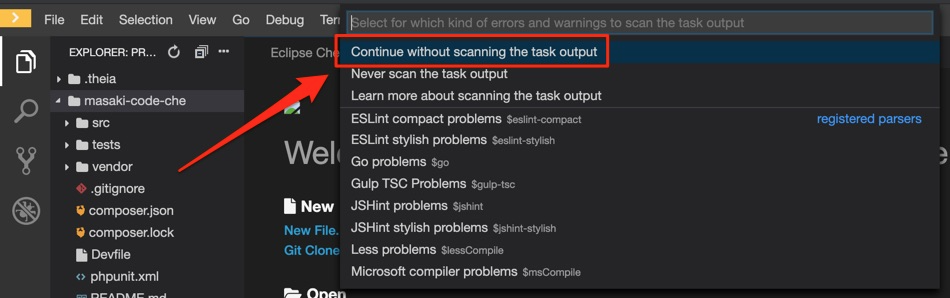
これで選択したコマンドの実行が開始します。
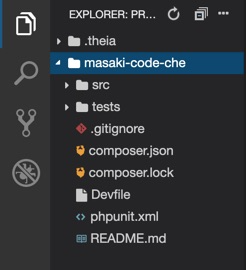
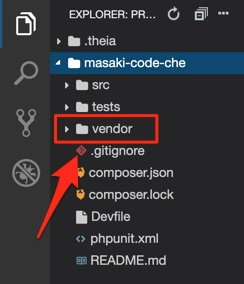
今回も実行後「vendor」ディレクトリが作成されていればOKです。
実行前
実行後
PHPUnitコマンド実行
先ほどと同様に「Run Task…」を選択してください。
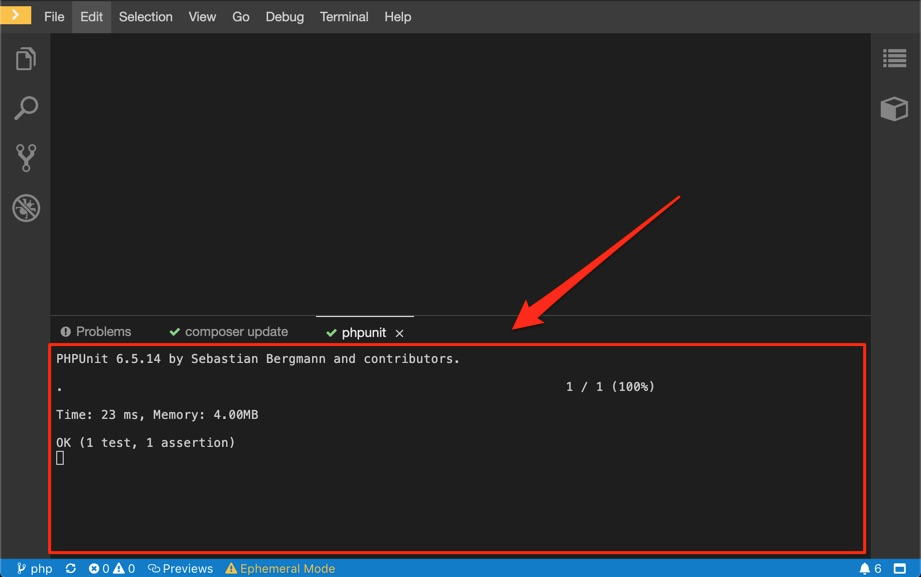
実行するコマンドの候補が表示されるので、今度は「phpunit」を選択してください。

これでPHPUnitを実行することができました。実行結果は以下のように表示されます。
サンプル
今回の作業のサンプルは以下に置いています。
コメント